Tuesday 26 May 2009

Things you don't expect to see

Some days you head off out somewhere with no particular expectations, just out for a nice day, hopefully in decent weather and getting some fresh air.

And it's usually one of those days when you see something unusual and unexpected. I'm not talking earth-shatteringly interesting or world-changing, just something that makes you smile, because it's out of context, amusing or unusual.

Sunday of the Bank Holiday weekend was one such day. We had to run some errands in Warrington, so decided to head a little further on to the Delamere Forest - we've not been before, wanted some fresh air and it was a lovely, perfect, early summer day.

We don't know the area and weren't sure of the best car park to use for the walking etc., so basically parked at the first one we came to. There were a lot of people, as you'd expect for a nice Sunday, but the car park was generously sized and there was plenty of space. The one thing I hadn't expected was the amount of horses and horse boxes. It's obviously a place where horse owners bring their animals to exercise and trek along the extensive bridleways. There was a hive of horsey activity, horses being saddled, rubbed down, fed and watered. Big horses, little horses, brown horses and white horses. Horses with business men aboard, horses with toddlers, being walked slowly.

But in the middle of this was a horse style box - but it hadn't transported horses - it had contained 3 llamas. Mr Boo couldn't resist going over to see if he could pet them en route to pay for the parking. He found out all sorts of information about llamas - for example, these were being trained for trekking with parties of people - and got to pet one too - he was advised not to pet the adults as they tend to shove and jostle you - and they're bigger than you think - but he got to tickle the youngster (far right) and stroke his furry lips. He didn't shut up all day about it. Because he got to pet a llama and I didn't. I did however pet one of the two three legged dogs we saw.

So I set off for some fresh air on Sunday, but really hadn't expected to see llamas, on leads, being taken for a walk.

Please click the photo for a larger view.

I'd been slowed down by my cameras being locked in the car boot (new car, had to actually figure out how to unlock the boot first) and just managed to snag this shot as they headed into the trees and deep shadow - I'd taken it at an angle to try and get them all in, as I was fully zoomed, tight in between the rumps of two approaching horses.

Sunday 17 May 2009

Squirrel with an identity crisis

We were eating a somewhat late and leisurely breakfast yesterday, as is our habit at weekends and I spotted this chap out of the kitchen window.

We have a handful of grey squirrels that visit our bird feeders regularly and we put food for them in their own box too. He must have been having his own breakfast when something caught his eye - I suspect it was a neighbour's cat, as later he went up a bit higher and was swearing quite profusely at her sitting in the garden beneath him.

Despite seeing squirrels daily, they don't often stand upright in this manner in the trees. He's obviously seen meerkats doing this and thought it was a pose with some observational value. I love how his left hand is holding on.

Click the photo to see a larger version.

I only had my small camera to hand at the time, set ready for some jewellery photos I was working on and the light was much darker under the trees than it looks, so it was zoomed to the max (380mm @ 35mm equivalent) and I could only manage 1/20 second - hand-held, that's somewhat of a big ask for even my steady hands. I wish I'd manually dropped the exposure a little though and avoided blowing the white fur catching a patch of sunlight on his chest.

By the time I'd upped ISO, the moment had passed and he was back on with his breakfast. My very dirty windows didn't help either, so the photo has had some work.

Friday 15 May 2009

Aluminium kitchen foil as a photographic tool

One corner of my workbench is allocated as my photography studio, specifically for jewellery photographs for my site and Etsy shop, so I don't have much space to spare, so I have to work efficiently.

I've written two articles on how I take my jewellery photographs and this blog is a supplement to them. One on the general photographic techniques needed to get the best out of small item photography and how to overcome most of the technical pitfalls people encounter and the other specifically on the lighting set up I have adopted.

I struggled for a long while with getting my photographs how I wanted, I was very much over-complicating it, because I had good gear and I felt obligated to use it. But it was unwieldy and impractical and eventually I stripped it down to absolute basics with a small digicam with a good macro mode and immediately my images both looked better and my workflow was significantly quicker and more enjoyable. I've since bought a digicam with better features specifically for my jewellery photography, I'll keep my DSLR for when that is the best tool for the job.

A finished frame after a little cropping and post-processing.

The lighting set up I use utilises a magnifier light I have on my work bench which has a ring fluorescent tube around a magnifier - I use it extensively for close work and it is clamped with an angle poise type frame to the end of my work bench. Whilst the light is certainly more diffuse than from a single spotlight bulb, it was still rather too harsh and unidirectional, so I made a lighting diffuser from a wild bird fat ball bucket which has two holes cut in it for camera access. I use the light on one side of it and I have the other side lined with scrunched aluminium kitchen foil. I have kept pieces of foil folded in my camera bag all my photographic life, it is an amazingly powerful yet simple tool to have in your arsenal - and can lift the light and brighten shadows more than you might expect.

When setting up some photographs today and was framing with the camera, I realised that I hadn't put my diffuser back in place after setting up the scene and as I replaced it and was looking through the camera, I was surprised to see how much it really did change the scene, so I took two photos to illustrate the difference.

This is the scene without the diffuser in place, there are
deep shadows behind the driftwood and the scene would
need more exposure for a better result. My camera was already
set in anticipation of using the diffuser, so you can clearly see how
much advantage it offers as this image would be much too dark.
I guess that the advantage is about two thirds of a stop.

Both photographs were taken with the same, manually set, camera exposure and with the camera, light and scene exactly the same - each file was prepared to post with exactly the same workflow and settings. The only thing that changed was the placing in position of my 'bucket' diffuser. The light has been diffused by the translucent material on the right side where the light was positioned and the opposite/left side has been lifted by the light reflected back into the scene with my scrunched aluminium stuck on the inside of the bucket, opposite the light source.

As you can see, the lighting level generally has lifted noticeably
and the deep shadows to the left of the driftwood have been
softened considerably. A bit of remaining shadow is good as it
shows more form to your pieces - diffusing the lighting too much would
actually give rise to rather flat lifeless results.


So if you're struggling with not having enough light on your scene, or deep shadows from unidirectional lighting, try scrunching some kitchen foil and then smoothing out and sticking it on some card - you can then move it around to see where you get most advantage. Using foil flat - or a mirror - will result in brighter spots of light and maybe reflections. Scrunching the foil to make it creased, then flattening it out causes it to scatter the light more evenly and will lift the lighting level generally without high spots or reflections.


The top of this pair of shots was taken with my foil reflector and the light only, no diffuser in this instance - I was curious to see just how much difference to the lighting the reflector alone made.

I took the first frame and all I did with the second image was swing my left hand holding the reflector out of the way and take a second frame - at the same manually-set exposure - just to show how much light a small piece of kitchen foil can add to the scene - in this case, about two thirds of a stop. The top one is still a smidge under-exposed and if I wanted to use this frame, I'd tweak its appearance, including correcting the colour, a little in post-processing, but the exercise was just to illustrate the difference to the overall lighting levels in the scene and the general distribution of the light and lifting of shadows, just with the addition of some reflected light.

This is the finished frame I'll use, from another frame taken with a slightly better exposure and the diffuser in place too.

Wednesday 13 May 2009

250th item added to my shop!

When I first started selling my jewellery on-line, I went through a slow and agonising process trying to decide on how best to present items for sale - I started with buying a domain name in some hosting with the full intention of starting my own shop - initially using PayPal buttons to create a pseudo cart. I had sold greetings cards for a long time using this process and it had worked well, but the jewellery didn't quite work as well - I needed more than one photo per item and much more space for measurements, descriptions etc.


I did a lot of work putting pages together and trying layouts and organisation and it became clear very early on that this was going to be a very tedious process. I seriously needed to hone the workflow into something actually manageable. It takes a lot of work to photograph jewellery pieces, measure them, write a description and price them - often this part takes longer than it does to make the item. To then have to write code to put them on a web page and keep the site organised, took it beyond practicability - on top of a day job and time spent making too - which is the fun bit and consequently likely to suffer.

I'd bookmarked and been looking at the US based hand made venue site Etsy for some time, but hadn't realised that as a UK crafter I could also have a shop there, so putting some items on there gave me the chance to embed my Etsy mini shop (as seen here in brief form on the right) onto a basic portfolio page on my site and bought me some thinking time.
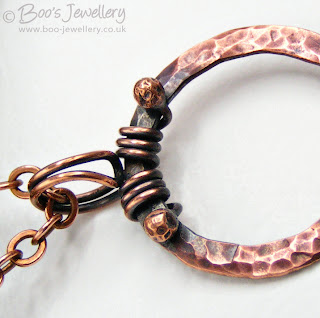

I'd visited and greatly admired an Australian jewellery store on-line. Their jewellery was elegant and expensive and their site gave just the right impression and worked really well - just what I had in my fantasy mind for my own - a page for each item, with multiple photos and nice easy navigation. I looked at the little credits at the bottom of the page and it said it was a Cubecart site.

Further investigation revealed that at the time there were three main cart systems of that style available largely free to use in the right web hosting packages - CubeCart, Zen Cart and OS Commerce. So I spent a great deal of time trying to find a host with them to try and I did try all three. CubeCart was head and shoulders above the others for me. At the time, it was the only one that allowed multiple photos per item and its methodology suited my requirements and skills by far the best.

I found that I could tweak the appearance myself by editing the standard graphics and editing the style sheets and thereby creating my own skin, based on one of the standard ones - this was a task within my capabilities. It also became evident that carts of this nature are highly customisable - there are a massive array of commercial skins and 'mods' to get them working how you want. It also became evident that the original Australian site that set me on this path was very heavily modded and I wasn't going to get something quite so elegant within my skill-set and budget.

I fully intended to buy a commercial skin once I'd satisfied myself that this particular cart was the right one for me - I needed to be sure I was making the right decision before I invested even more work. I chose a skin, but spent some time modding my own from one of the three that come with the cart as standard. I wanted to add some items to see how it worked in practice. I put together a finished enough looking site and asked a few friends and family to test it for me, showing them the final design I was aiming for. Every single one of them preferred the working site appearance to the skin I had picked out, so I just stuck with what I had and spent the time polishing that up some more instead.

So that was about 15 months ago now. I've gradually modded the site to get it functioning more how I want it and I still have a lot more ideas to put into practice as the budget will allow. I find the site easy to work with - it might not be as good for other products or other methodology, but I have been thrilled with how it works for me. I suspect if I were significantly busier and had more staff, it might not be the best, but for me and my workflow, it has been absolutely ideal.

I now maintain both my own shop and a sister one on Etsy as separate entities - I've finally honed a workflow to allow me to use a lot of the same process for both shops and feel comfortable at last with how I'm working - I don't think I can strip it to much greater efficiency and maintain the same high standards - that simply takes effort.

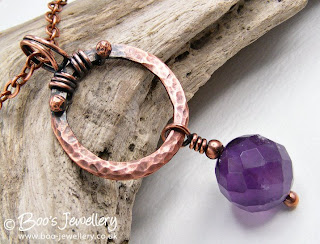
Yesterday I added the 250th item in my own shop, the copper and amethyst necklace shown above. There aren't 250 items actually for sale, so it's a tad misleading, some items are upgrades and buying options and 48 unique pieces have been left on the site but moved to a sold section, but it felt a significant milestone to see 250 'products' in the shop. When I was tearing my hair out trying to figure out how best to offer my pieces for sale, this milestone was the stuff of pure fantasy. I'm glad I stuck with it, the results now are what I hoped for, but I wish the journey hadn't been quite so agonising!

Sunday 10 May 2009

What were you doing to make that discovery?

This story is going to fall into the category summarised by the old adage - what did the first person who got milk out of a cow actually think they were doing? In other words; what on earth were you up to to make that discovery?

My husband is a terrible snorer - actually, that's not true; he's very good at it. He's loud, rumbustious and it's very distracting. When he snores, I certainly can't sleep and the resulting quality of his sleep isn't good either. He already could have represented England at the snoring Olympics, but after a spell on a life support machine in 2005 necessitated by acute respiratory disease from septicemia (burst appendix > peritonitis > acute infection > full organ failure), he stopped snoring entirely for a while - it was heaven when he first came out of hospital.

It was actually a tad disconcerting, without the sound track to his sleep and no breathing sounds at all, I regularly woke him to ensure he was still alive. A lot of time in ICU can make you that paranoid. But it didn't last, my joy was short-lived. And when he did start snoring again, it was more rumbustious than ever. When he's on a roll, neither of us feel very refreshed in a morning.

So the doctor recommended he try some nose strips - just before they became widely available on the high street and advertised on TV - the only time you saw them was on the noses of rugby players and the like on TV. It appeared that it was his airways in his head closing up that was the source of the ungodly sounds.

They worked a treat - he still makes some small snoring sounds, it hasn't cured it, but it has made life significantly more bearable for both of us. There are many reasons why people snore, so it won't be the answer for everyone, but he only needs to miss putting it on one night for us to realise how well they work. They're pretty expensive, but we think it's well worth it for a good night sleep.

That was the explanatory pre-amble - now to the point I was leading up to. A few nights as we got into bed, ago he uttered the rather alarming words "put the light off, I've got something to show you". He then crinkled some paper and told me where in the dark to direct my eyes and again tried to sell me how wonderful his demonstration was going to be; "you're going to love this."

I have to admit, I was actually more impressed than I expected to be. There in the darkness appeared a blue phosphorescent type glow. He repeated the demo. His nose strips come in a little sealed sachet, rather like sticking plasters/Elastoplasts. When you pull the two layers of the packet apart, the glue layers separating make this glow.

A graphical facsimile of how it looks, the strip of blue glow
appears at the point where the two surfaces are just coming apart.


I have no idea if it's static or some sort of natural phosphorescence from the components of the glue, or whatever it might be, but it looks pretty cool. I've tried it with several other gummed paper products and got the same blue glow. It has to be very dark to see it and it's only a fleeting glimpse. It seems to work best with tacky type glues that will stick back together repeatedly, rather like a Post it Note - the tighter they're stuck, the brighter the glow. Perhaps the most productive product has been the all-over tacky paper packet that my breakfast cereal was in. I'm a girl who really knows how to have fun in bed.

So it does beg two questions; Would astronauts be allowed to use nose strips on the shuttle? And what on earth was he doing with his nose strips to discover this?

Thursday 7 May 2009

Can anyone identify this plant?

Whilst I don't claim to be any sort of expert when it comes to nature, I have lived quite a while and do like to spend time outside, so I have accumulated some knowledge of the natural world. But on a recent walk, I spotted a flower that wasn't at all familiar.

It had the look of an orchid, so I took a few photographs of it just to allow me to grab the nature book back at the car and find out what it was. I only had my compact camera with me as it was very cold, blowing a gale and I couldn't be bothered man-handling the SLR that day. Due to the wind and it's location under trees and adjacent to a wall, it was hard getting the shutter speed up fast enough to freeze it from moving in the breeze, so this is the best shot I got.

Please click on the photo to see a larger copy.

The leaves adjacent are not part of the plant, I think they're garlic plants that were just in bud at the time. There was a patch of flower stalks like this just sticking out of the ground - about half a dozen, all seemingly with flowers appearing just on the one face. They're a pinky-neutral colour and the best approximation I can make from my books is that it's a Bird's Nest Orchid.

Bird's Nest Orchids are reported as being associated with close proximity to Beech or Yew trees, but from the leaves in the photos you can see the predominant trees in the area are oaks.

Please click on the photo to see a larger copy.

My books and the searching I've done seem to have turned up photos that are similar, but the Bird's Nest Orchids seem to be all of a single colour (as they lack chlorophyll) without any sort of patterning and somewhat glutinous looking. These seem to have some variation in the colour, with pink tones, so I wonder if they're actually something different?

The photographs were taken along the western shore of Windermere, just adjacent to the path along the lake between Red Nab and Wray Castle. It's a busy and popular spot for walkers, cyclists and horse riders and the flowers were only inches from walkers, I was stood on the path when I took the photos.

Monday 4 May 2009

One of natures great engineers

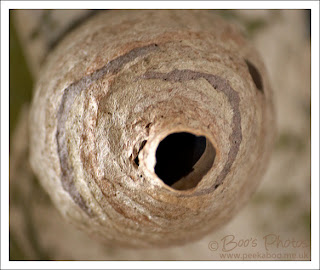
We went out in the garden to do some work yesterday (see last blog) and as I stood on the doorstep I could hear a little noise - looking up there was a wasp working on her nest on the door frame. It's a fabulous structure, but we couldn't leave it there. I just managed to snatch a handful of photos before Mr Boo removed it. And yes, my door frame does desperately need painting.

This was my first view of the nest, pretty much in silhouette in the door frame.

It was a stunningly clever structure and I was loathe to break it off, but having seen how large (and how fast) one got in a friend's garden last summer, decided we needed to be rid of it at this stage.

My reading would suggest that at this time of year, the larger than average wasp building the structure was probably a queen. It seems that all wasps except queens die off over winter and she survives having holed up somewhere safe in an old nest or new small one she makes just for the purpose. In late April/early May, the queen starts off making a small new nest in order to lay her eggs.

She was fertilised last year and lays her eggs in the new part-made nest and as they hatch, they continue with the structure in order to make a full size nest for the entire colony. The nests can grow up to 30cm (1') in diameter or more and will likely be occupied all summer. Looks like we were right to destroy it before it took hold, she won't have been alone for long.

She was very, very annoyed that we undid all her handiwork,
had it been in a better position, we might have left it to develop
and observe, but it really had to go from where it was.


She disappeared inside at one point and I was hoping to see what she
was
doing, but I was in a very precarious position with a heavy camera and
long lens in one hand and too close to focus, so ducking further
and
further back to try and focus, so it has a little movement blur.


Last summer I experienced the same little noise when out in the garden and it took me several days to identify it. That too was a wasp - on that occasion he was gathering his building materials rather than using them. He was working away on an old wooden garden chair, removing bits of timber in long thin strips, which he appeared to sheer off with his mouth parts and coil it up as he worked - when he'd got a decent sized piece, he'd fly off out of sight with it, only to return shortly and repeat the process. They apparently chew the wood up into a pulp with their saliva and this gives rise to a paper-type product for the structure of their nests.

Over a few days, he stripped the surface off a lot of my chair. If I went close to either observe or shoo him off, he'd just vanish round the back and continue working, thinking I didn't know he was there, removing my garden furniture a few grams at a time. The little noise of timber being stripped being the only clue that he was still beavering away on the timber for his home.

In this frame, most of the timber surface has been removed, you can
see the exposed rough fibres and the odd remaining patches of varnished
surface where he's 'missed a bit'.

Sunday 3 May 2009

It's amazing what there is to see when you look closely

You can click any of the photos to see a larger version.

My very modest postage stamp of a garden has been a great joy to me since we developed it from scratch. It has filled out and developed over the years into a haven of peace - the place I reward myself with time when I reach some deadline or the end of an especially tricky piece of work. I potter and tinker as I eat my lunch and work outside on every day the weather makes it possible.

I laughingly call it my 'courtyard garden'. In reality, it started life as a typical yard to a Lancashire cottage - a walled patch of concrete, originally to house the outside facilities - and in more recent times, the bins.

There is a tale attached to the layout of our house and outside areas, which are pretty much back to front. It would be normal practice for houses to face the street and have their back yards on the side of the house furthest from the street, but our house is one of a collection of cottages, all slightly different, that housed the workers of the adjacent mill. Mine, the largest and end of a short row, is reputed to be the mill manager's cottage. My yard and back door are on the street side and my 'front' door on what is the gable end.

When they were built, the owner of 'our' mill was in some sort of feud with the owner of an adjacent mill, who owned a very large domestic property of some status (in recent times it has been a nursing home) along from the row of mill workers' cottages. In order to cause him maximum offence, our mill owner built the properties back to front, to ensure that the outside facilities and less attractive aspect of the houses faced the road, so that as his rival drove past to his large luxurious home in his carriage, he had to pass the back of the workers' homes, offending his sensibilities.

Our cottage is a long thin stone built property of about 140 years old now. So the yard is long and thin too. We have our proper garden on the other side of the house, but the layout doesn't make it as suitable to occupy, so I leave that as my bird garden - one to be viewed from inside and enjoyed through windows and my courtyard garden is the one we spend time in. Being fully walled it gives us more privacy and is a sheltered sun trap that has allowed it to thrive.

Due to unfortunate domestic circumstances, I'm not going to be able to spend any money on summer planting this year, or at least only the barest minimum. So I decided today to make the best of what we already have.

I've always kept a lot of evergreen plants and perennial greenery to supplement annual flowers, which ensures that it looks good and has interest all year. Which will come into its own this season when I can't do so much summer planting. So we moved things around to fill gaps and re-potted things and gave it a good tidy and I was pretty happy with the results.

It's at that exciting time when everything is waking up after winter and even supposedly 'green' shrubs develop little flowers and new growth races away. I took some photos - most of these below are of very small areas of growth, tiny little flowers at the end of shoots - some only a few millimeters in diameter. This is why I love taking photos of little things - you get to see detail that you just don't see with the naked eye.

I was astonished to see that this little flower at the end of a growing shoot actually has striped petals on the back - why does nature bother to give it this detail?

LinkWithin

Related Posts with Thumbnails