If you want more information on photographing small objects in this manner, I also have a more general tutorial on the photography process itself, in respect of small items.
I had reason in December, when taking some product shots for a client that were a little large for my usual diffuser, to utilise a larger bucket I'd saved for such purpose, to make another larger one. I incorporated the new feature ideas I had in mind and liked them so much, I added them to my regular small diffuser too. I now alternate between them, depending on the size of the piece I need to photograph, or the set props I want to squeeze in. The new features have been really indispensable, so I wanted to outline them for those that found my original tutorial useful.
The basic premise - and I do recommend reading the article linked to above first - is to use an upturned translucent bucket (mine contained fat balls for wild birds) as both a lighting diffuser and reflector, for small item photography. By lining the side opposite the light source with scrunched aluminium foil which reflects a great deal of additional light back onto the subject, I can get away with using a single light source - although granted mine is a daylight fluorescent ring, so the light is quite spread already and a good colour.
I already have a magnifier light clamped to my work bench to use when working on small and fiddly things, so I developed the original diffuser to make use of this and minimise the set up time when I need to take photos - for many years I'd been over-complicating things using multiple lights and my DSLR and it was just no fun taking photos at all - once I cut out most of my gear and started using a compact camera, it became much more workable.
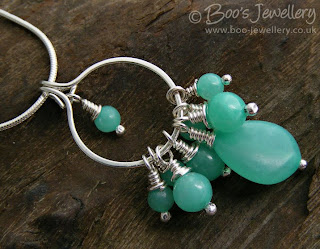 Sometimes it's easier to get an overall flat view by lying the subject flat
and shooting it from overhead, using the hole I cut in the top for this purpose.
My diffuser lives pretty much permanently on the end of my bench on top of a pile of background papers and I just pull to the top of the pile the one I want to work with. Consequently, I don't have much space to work in and so must do so efficiently.
Please click to see a larger view, it's easier to read the annotations.
Further to the original tutorial, I have added 4 features to my bucket diffuser:
- Some background paper inside the bucket to give me a safe shooting zone for lower angles;
- A small slot cut in the top/bottom to take a clip to hold additional background papers;
- A hole drilled in the side to allow a dowel, twig, rod or wire to be passed through to hang earrings off;
- I've lined the lid with scrunched kitchen foil to use as an additional diffuser and protect from reflections.
My original bucket worked pretty well, but I had to be mindful of my angles taking the photos and keep above the subject, so that I didn't catch any of the inside of the bucket in the background. But occasionally, you want to shoot something as though it were at eye level and this perspective requires a suitable background behind. So I tacked a fairly narrow piece of vellum textured white card opposite the opening I take photos through to give me a small region of safe background to align myself with when needed. As most of my subjects are small, it doesn't need to be very wide. Using white as a starting point didn't impact on the light levels.
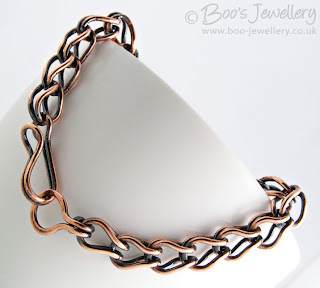 Sometimes I like to shoot from below the subject, or at eye level and this requires a safe area behind the subject.
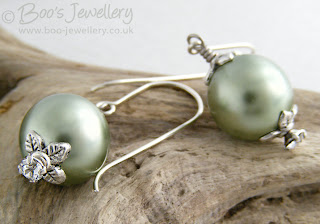 Using tracing paper on the light side of the 'bucket' diffuses the light source nicely and softens the shadows from the uni-directional light, but I still like to see some shadow to give the subject form and depth, so I don't diffuse it too heavily.
2. To supplement this, I also cut a slot in the top (what was the bottom) of the bucket to allow me to use a small stationery clip to hold additional backgrounds in this area. I made this slot by drilling a row of holes parallel to the edge and then cutting the spare plastic out from between them and sanding off the rough swarf.
I tend to use long thin background papers with this clip, to allow me an infinity sweep type background behind long earrings etc. If I attach it at the top and let it naturally curve behind the subject and onto the base, I have no 'joins' and this increases my space visually.
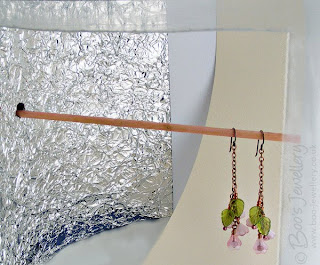 Using a long narrow piece of background paper, clipped only at the top, I get a natural curve behind my subjects.
3. As you can see in the photograph above, the earrings are hanging on a piece of dowel. My third new adaptation, was to drill a hole in the side of the bucket so that I can poke a rod, dowel, wire or twig through the hole - clamped securely outside of the bucket - and hang earrings and other pieces from it. Previously I had a stand I used within the bucket, but this is much simpler and works much better for me - I found the earlier incarnation to be clumsy in use.
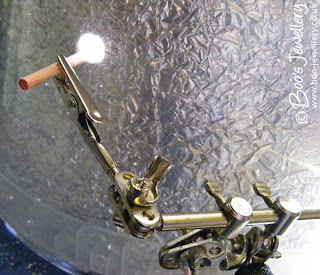 I used a 'helping hands' style clamp outside the bucket to hold my dowel in place. I've since made a purpose built clip on a weighted base that takes up less space and frees up my clamp for other tasks.
4. After trying to trace a bright yellow reflection in some polished silver one day, I realised that the open top of the diffuser bucket is quite a vulnerable spot when taking photos of flat reflective surfaces. The hole in it (cut to allow overhead photographs to be taken) offers no protection from reflections - my yellow spots were from something small on a shelf above me - so I lined the lid from the original bucket with the same scrunched aluminium foil and just sit this over the top of the bucket to kill any overhead reflections and to further reflect a little light back in - I found that I have gained a third of a stop exposure just from using it and it makes the overall light that bit more diffuse too. So I just leave it in place unless I need to access the top.
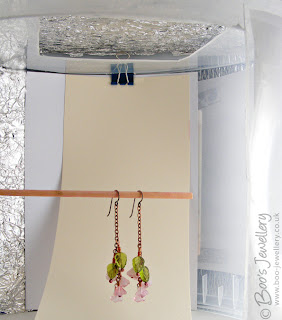 In this case, I used a dark blue clip to hold my background paper, so that you could see it in the photos, I usually use a white one. You can see the foil reflector above, stuck to the inside of the spare lid.
I can easily lift it off when I need to use the hole or clip papers in place, or just use the overhead hole for wrangling my subjects. I actually lined the outside of the lid as it had a lip which stood proud and this allows it to sit in place over the smaller base.


9 comments:
Thanks for sharing your great photography secrets!
I have awarded you a blog award - see my blog for more details:
http://sixskeinsunder.blogspot.com/2010/01/spread-little-sunshine.html
I just love those earings with the pink flowers. I think I'll have to treat myself at the end of the month.
Thank you both.
Thank you for sharing such a fantastic tutorial Boo! You have included so much detail!
I've linked to it as my 'Tutorial Tuesday' this week on my blog so that more people see it.
Jo
Many thanks Jo - much appreciated. Apologies for not publishing this comment sooner, I couldn't seem to make it appear.
This is absolutely amazing, Boo! Thank you so much for this, its the most well written and helpful tutorial I've come across on this subject!
Very nice work!
Hi Boo. This is simply sensational. I've been having a complete 'mare with my photos. I've git a swanky digital SLR and lovely light tent but my pictures have been diabolical. It's mostly been a lighting / diffusing problem, but I also think it's partly my camera!! So, it's off to get a bucket and set to work! A smaller digital camera's also on the cards (for our motorbike trips, but that's another story ;-))
Thanks a gazillion for taking time to share this, it's fab. Your jewellery's also fab.
Thanks Wendy - I found that for small objects like jewellery, my DSLR was simply overkill and was far harder to work with - I was never happy with the results I got with it. Once I started using one of my smaller digicams it all became much easier - you can work a lot closer to the work and have a greater depth of field (more in focus from front to back) in the same lighting (due to the smaller sensor of the camera). Maybe try your small camera when you get it, I found the entire perspective of working smaller that way gave me instantly better results.
Post a Comment