I've had to work on how to get the best of it when actually taking photographs - and that's something I still haven't settled on yet - every time I think I've mastered what's required, a series of photographs disproves my earlier conclusions and it's back to the drawing board. I've never had a dilemma quite like this before with any camera.
Please click on any of the photographs for a larger view, they tend to look rather dark here on the page.
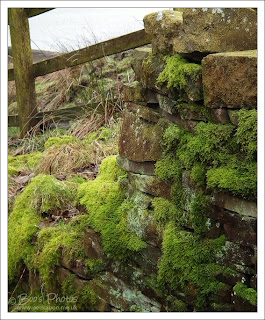 A recent image with the new camera taken on a very cold and grey day - which didn't quite work when I took it, but some extra saturation and a different sharpening technique brought much more out of it.
Some of the problem stems from the fact that I like to work with RAW format images, that is, the camera records the data of the photograph without finally processing it into an actual image - you download the file to the computer, then use software to make that final conversion. The idea being that your computer, coupled with your own knowledge and hopes for the photograph, combined with the luxury of time and sophisticated software, can do a better job of it than the camera can in the milliseconds it has to process the image for you.
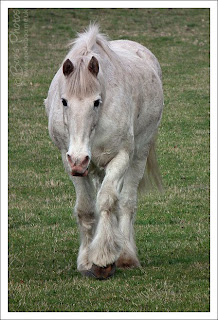 I was tinkering with my 720mm equivalent lens on my lunchtime walk and this chap thought I needed investigating and came over for a closer look - at the time he was the other side of the field.
 The camera itself is restricted to the recipe of image processing algorithms that are preset between the camera manufacturers taste and the settings you chose in the camera - like saturation level, in-camera sharpening etc. That becomes a sort of one-shot deal - once the moment has passed, that image has been recorded within those constraints and whilst you can post-process it later to quite a large degree, some aspects of it may be beyond retrieval.
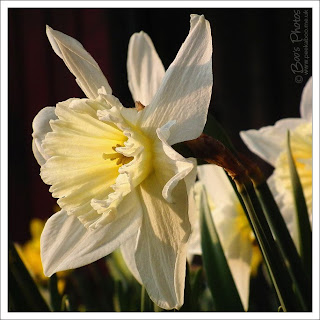 The daffodils outside the house are at their most perfect at the moment and the patch of them gets the last dying rays of the sun as it sets behind buildings opposite and gives them a lovely evening glow.
So working with a RAW format gives you a second chance to wrangle a better image from the data you recorded when not constrained by the camera processing. It also gives you an opportunity to develop more than one version of an image and merge the best from each - this is a practice I especially like to do, predominantly with landscapes, which have a lot of contrast in the scene - if you get dark areas under trees well exposed for example, this might leave the sky too pale and you might blow the highlights of white clouds or reflections from water. In the past you might have done this with bracketed exposures taken at the same time, but this needs a tripod and still conditions to work well.
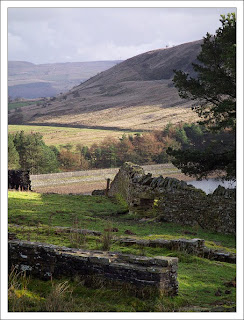 This image could not have been achieved, as it looks here, from a single in-camera JPEG - I developed two versions from the RAW file - one to expose for the distant hillside in full sun and another for the dark foreground areas in deep shadow. I manually blended them to get the best from each exposure.
 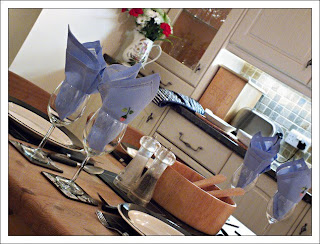 You can blend separately developed images from the RAW file for colour as well as exposure - in this interior I did for a client recently, the grey tiles under the cupboard had a different colour cast from the rest of the room and were over exposed too due to the proximity of the lights - but I could blend the best of two versions of the image to get a natural looking result, more in line with what your eye and brain are capable of interpreting at the time.
You do of course see an image in the camera as you work with RAW files, as usually a small format JPEG is recorded at the same time as the RAW file is saved and embedded within it, otherwise you couldn't view your photos back in the camera or preview and identify them on your computer.
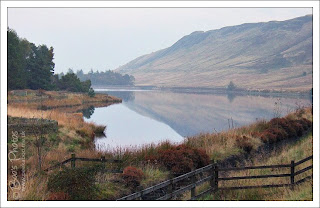 An image that I never did get to look quite how I wanted and in line with how the scene was, but some work on it retrospectively gave the result I had been after. Sometimes revisiting such images later with fresh eyes gives better results.
With my DSLRs I've always chosen to work with a RAW format and had a good workflow for doing so - I thought any extra time that process took (and I'm not convinced that it actually did) was more than repaid in better results. I got into good habits early on and didn't actually find the process tiresome, as many often cite as a reason for NOT shooting RAW. I preview my photographs (i.e looking at the embedded JPEGs just mentioned) in image viewing software and choose the ones I want to look at in more detail, then move to the RAW development software and only work on the ones I've already shortlisted - I certainly don't develop all of the images I take in a RAW format and often, the embedded JPEG is good enough for many uses.
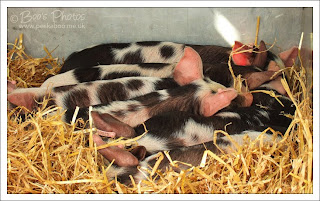 What's not to love about sleepy piggies - another older image revisited with the revised workflow which gives a result more like what I saw and wanted from it.
And this is where my difficulties stem from with this camera. It has the ability to shoot RAW which was a big tick in the plus column when initially choosing the model. But, the particular file format is not well supported by many of the main RAW development softwares and those that do, won't work on my now old and insufficiently specced computer or they cost lots of pennies - and still won't work on my old computer. It does of course come bundled with a suitable application - but it's very much a stripped down 'lite' version without many of the functions I would consider essential - although they tantalisingly leave them visible but greyed out to add to the frustration. It's also very slow and a resource hog on my poor tired old computer. Plus, I simply don't like it very much. I really like the application I use with my DSLR images and that has spoiled me somewhat.
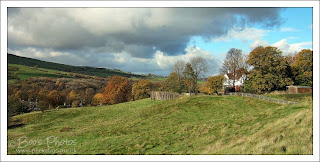 The scene at the top of the hill on one of my lunchtime walk routes. By the time I reach this point I tend to be gasping and panting and happy to just stop a moment and enjoy this scene.
So I'm currently having a battle between short term ease of use at the moment and better potential image quality - complicated by the likelihood that I will hopefully get a new computer in the not-too-distant and then I would be able to revisit images I've already taken more easily. So, for today at least, I'm just shooting JPEGs and as soon as I take an image that needs something more than I recorded, regret not having a RAW image to tweak. I'll certainly change my mind again next week; I'm already on 'Plan J'.
But all this contemplation has caused me to revisit my image workflow too - perhaps a task that was long overdue. With the need to produce jewellery images very quickly and efficiently, I developed a workflow for them specifically and set up scripts for functions like sharpening, that gave decent quick and dirty results. These worked well enough for the web based jewellery images, so I got into lazy habits and started using the same workflow for all of my images. But this didn't seem to work quite as well with images from my new camera, so I decided to go back to basics and work through my original more thorough workflow for my 'leisure images' and see if I could hone a new workflow that could be made just as efficient and hopefully give better results.
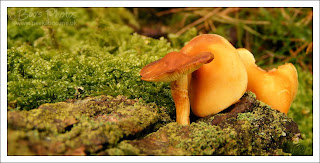 I can't resist the abstract shapes and colours of fungi and this was taken on one of my favourite walks in the Lake District that in autumn has a diverse range of fungi growing amongst the trees.
I always used to enjoy tinkering with images to get the best possible result from them, but the need to bang out jewellery photos in volume as efficiently as possible had somewhat spoiled that process for me, but looking at it more carefully again, the bug re-bit me and I think I've now settled on a processing routine that will work well with my new camera images, but can also be applied to all of my other images too as I've honed some scripts that use the best of both workflows.
So armed with my re-awakened enthusiasm, I picked some older photos at random and re-worked them, just to see if my new ideas had merit across a range of images from different cameras, some of which are posted above.
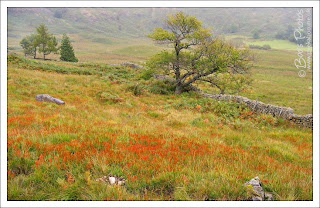 This was taken on a damp drizzly and cold August day and I wanted to try and re-capture that misty glow that the scene had with all the moisture in the air.
Time to grab my camera and head out for some fresh air whilst it's nice - now what settings was I supposed to be trying today . . . ?

1 comment:
Stunning photos! Thanks for sharing :-)
Post a Comment