From the opening post by WillowontheWater:
"Sure, you CAN get some great shots off of a low end camera, but how long does it take? Not only to get the shot, but then to edit it? I have said it before and I'll say it again... the proper tool makes all the difference."I added my own thoughts to the subject too. Whilst the opening post had some indisputable truths, I felt that it was in no way the whole story. Getting decent product photographs is a combination of equipment - both camera, lighting and staging - but perhaps the most significant factor is technique. Understanding your camera, some of the basic principles of photography and how to get the best from what you have, would actually solve the vast majority of photography problems posted about in the forums.
Please click on any of the photographs for a larger view, they look rather dark here on the page.
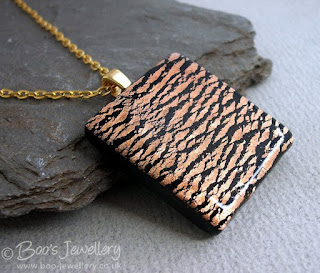 A polymer clay faux dichroic glass pendant taken with a very basic point and shoot camera with minimal setting options.
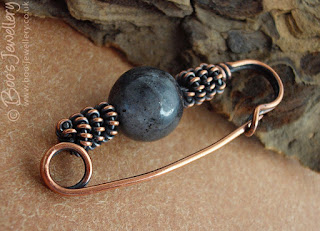 Most of the problems posted are about 4 main issues; blurred images (due to either camera shake or inappropriate focus), the wrong part of the subject being in focus (usually due to using the camera closer to the subject than it can focus), incorrect white balance (whites looking blue or orange etc.) or exposure problems - and those are almost always about items on white backgrounds looking too dark and coming out with grubby backgrounds. It doesnt matter how much light you throw on your subject, if you underexpose for the scene, the images will always look too dark.
The advice posted is often to shift the levels in photo editing software retrospectively, when in reality, all the crafter needs is to do is to add some positive exposure compensation to ensure that the white background looks white in the resulting images.
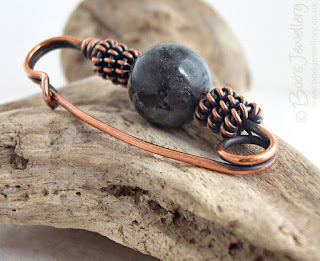 Using a little positive exposure compensation in shots that are predominantly light can ensure that your white backgrounds stay that way - in this case I used two thirds of a stop of positive exposure compensation (+0.67 EC).
Much more detail on overcoming this sort of photography problem is covered in my small item photography tutorial and doesn't need to be repeated in detail here at this time - and I have a list of all my photography articles and blogs on this page here on the blog.
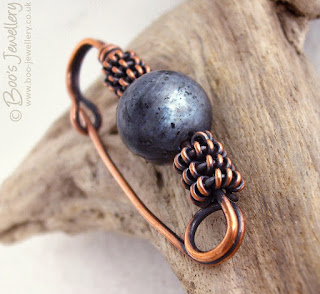 It's an oft-posted mantra that the crafters don't have 'enough' light to get bright photographs - in reality, it's possible to take perfectly good photographs in very little light indeed - what does matter, is how you expose for the light that you do have and how you manage your technique when the light levels fall.
If your lighting level is low, you may encounter problems associated with slow shutter speeds for example, resulting in camera shake from your hands moving whilst the shutter is open to take the shot - that can be overcome by either changing camera exposure settings to ensure a faster shutter speed, where that's practical and possible to do so (it wasn't in my little experiment shots here due to camera limitations), or by using a support for the camera, like a tripod or bean bag.
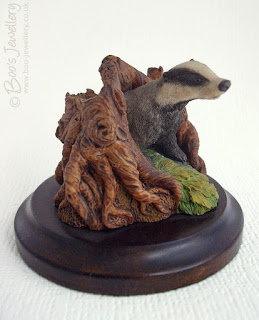 The opening post in the forum thread in question linked to a blog with some example photographs taken with a basic model second hand Canon point and shoot camera - which actually had a higher spec than the examples I've posted here. Considering that the poster is an experienced and very capable professional photographer, I think the photographs were taken by just pointing and shooting and very little regard for correct technique for the subject in hand, perhaps just to make the point that you can't just 'point and shoot' them. The photographs were pretty appalling (the point the poster was making) - but I didn't think they needed to be.
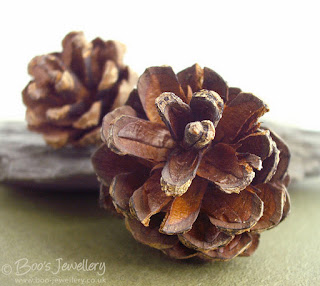
It was my contention, as already stated, that technique is by far the most powerful tool in your arsenal - I've often said that a little know-how and understanding can make a massive difference. All of the photographs posted here were taken with a Fujifilm A850 camera that my husband uses as his own walkaround camera. He has no interest in fiddling with settings, so I've pre-set this model with some settings to suit his personal uses for the camera and he just switches it on and squirts away at the scenery and gets some annoyingly good results too.
The camera is very basic - it cost us under £60 GBP 4+ years ago. It has 3 modes, one for photographing babies that doesn't use flash and offers soft skin tones (I'd like to try that for this task, it might actually work quite well), fully Automatic and what they call a 'Manual' mode - which in reality is the same as auto, but the camera relinquishes decisions about some settings to the user. I chose the latter and put some objects in my usual lighting setting - a daylight fluorescent ring light with a diffuser over my subject - I couldn't adjust exposure other than by using exposure compensation and I couldn't even turn off the flash, which seemingly came on when the shutter speed went too low - so I found I could prevent this from happening by being careful with the exposures I secured.
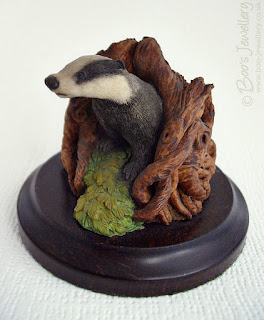 I used macro mode, which allows the camera to focus closer to the subject than for general photography and I used Auto white balance for most of the frames, as I was using a daylight tube and it seemed to work reasonably well - some looked a little cold, so I swapped to the fine/cloudy pre-set, but once on the computer, these actually weren't as realistic for colour, so I adjusted them to match the earlier AWB shots.
I found focusing more tricky than with my usual, slightly more featured product photography camera and I can see now that some aren't optimally focused, so some more time with the camera would learn the quirks of its focusing - as it tended to shoot with a wide open aperture and this led to a shallower depth of field than I usually try to achieve, which in turn gives a greater margin of error for sharpness - so as I can't control aperture, I'd need to be more mindful of that in future and focus more carefully.
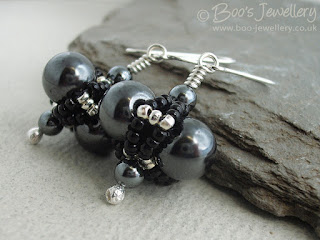
Far from spending a lot of time on these, they had exactly the same workflow as I usually perform on my product shots - in fact somewhat less, as these are sharpened in the camera and have higher contrast than I normally use, so I reduced/omitted these stages in my post processing. I started typing my post here less than 30 minutes after picking up the camera, so that was the time I spent taking the shots, dusting some of my props, booting the computer I download images onto, transferring them over the network to my working computer (which acts as my back up method too), choosing frames, post processing and saving the finished images.
The exposures/tonality are largely as they came out of the camera, I cropped for framing, tweaked white balance a little as the auto WB did fluctuate a bit between frames (I wouldn't normally choose it for that very reason), did very modest levels adjustment - as I would with any shots - cloned out any fluff or dust and reduced in size and locally sharpened. If you want to see the exposure information, the EXIF data should be intact in the images, but you'll probably have to click through the image to the gallery overlay, then select the link for 'Show original' in the bottom left hand corner.
I was curious to try and see just how workable a very basic 'low-end' camera could be in practice and whilst I can see there are clearly some shortfalls in these photographs and they certainly don't look that pretty at full resolution, the results are actually better than I was expecting and having checked them on the computer, if I were to repeat the exercise now with what I've already learned, I would expect the next series would be somewhat better with appropriate tweaks in my own technique appropriate to this camera.

6 comments:
Excellent. I really appreciate you having gone through the exercise. I use a point and shoot for product photography and while I could use improvement, it has been fine for my needs with minimal post shoot processing. While I do long for a dslr like my daughter uses, I think you can get perfectly usable photos if you account for your lighting and the range you focus in. I've learned a lot from your previous tutorials. I thank you for those as well.
Many thanks - I'm glad that it (and earlier blogs too) was useful for someone - I wanted to illustrate that even with very modest equipment, a little know how and care can still get decent results - because not everyone has the funds for expensive gear or wants to be bothered having to learn how to use it. People can usually improve their results and overcome problems without having to spend any dosh at all.
Interesting. thanks. I was thinking of asking for a macro lens fo Christmas
If you already have a DSLR and know how to use it, a macro lens will certainly make life easier as it allows you to work much closer to your subject and is no doubt better quality too.
But for those that wouldn't know what to do with a DSLR, it would simply be overkill to spend that much money and then have to wrestle to learn to use it. A mid-range digicam that allows the user some decent controls (like custom white balance, exposure compensation and a range of ISOs) is more than adequate for most people.
I agree wholeheartedly with your point that technique is your most valuable asset.
What's the point of buying a DSLR if you don't know how to use it?
Thank you for the blog entries on how to improve your technique. It was a very interesting read, and it kindled my enthusiasm for taking photos.
I have a Canon Powershot S5 IS, that I don't know how to use properly.
Your blog entries made me realize that I should get a book explaining the basics of photography and take it from there.
Thanks Marianne - delighted if you found it of interest and value. For those that are already finding product photography difficult, spending on a more sophisticated camera is unlikely to make them any happier. You need some basic controls to make it manageable - for example, the basic camera I used didn't allow you to turn off the flash, which fired automatically if it felt the light level was too low (and the resulting shutter speed was too slow), which would spoil photos and make it very irritating if you didn't have enough light.
Probably the best solution for most people would be an intermediate camera like the Fuji S5700 I use - which I paid very little for when a new model came out and they slashed the prices of earlier models - always a good time to buy.
Enjoy you camera - it certainly makes it more fun - and successful creatively - when you understand a bit more, so well worth doing a bit of learning.
Post a Comment