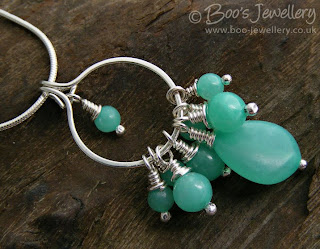
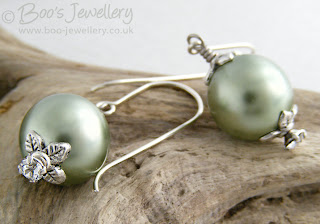
Showing posts with label jewellery photography. Show all posts

Monday, 15 November 2010

Why do the simplest ideas take longest to drop?

I wonder sometimes why it is the very simplest of ideas that take the longest to sink home. Sometimes an idea comes to you that is so deliciously simple that you cannot comprehend why it hasn't popped into your head beforehand.

This is how it was yesterday, whilst doing something entirely un-related and not even thinking about this, I had an idea that was so simple, I have no idea why it was so long in surfacing.

I've blogged here (see the archive to the right for various articles) and written at length about small item photography and shown my own personal lighting set up for my jewellery photographs. My 'fat ball bucket' diffuser, whilst a source of some amusement, works incredibly well, especially as I've gradually modified it over time to address assorted problems and to increase its versatility.

It's a permanent fixture on my work bench, utilising the magnifier lamp with a daylight ring tube that I already use when working - and which was recently replaced when the one I'd had for some time just died on me.

Please click on any of the photographs to see a larger view.

The diffuser bucket works well for most photographs and its integral background, when exposed correctly allows me to create 'infinity sweep' type photographs in a very confined space.

I use it daily and it makes my work much easier and its small size means that it's always around for me to pop an item under to photograph without having to set anything up, which I might well find to be an even further deterrent to getting items photographed and offered on-line - a job I find sufficiently tedious that I don't need anything more to put me off the process.

But whilst it works really well - in some ways it's a tad too efficient. It uses only one light source yet gives me a good all round diffused and reflected light, which still maintains a little shadow detail to give items form. But occasionally the light is too flat and too well diffused. Some pieces need a bit more reflection and a bit shadow to bring out their form and show their details.

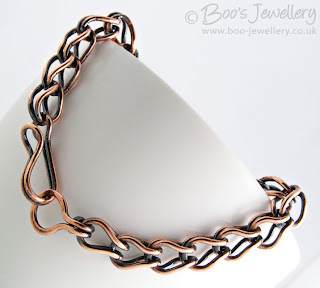
The texture and depth of this copper etching is rather lost in this well diffused image using my bucket diffuser. For some pieces you want to kill reflections, sometimes you need them, to show the piece accurately.

I've found this to be the case with the recent copper etched pieces that I've made. Because the etching is quite deep and oxidised to bring out the design, when photographed within my diffuser, it looks somewhat flat and the texture isn't as evident as I'd like to see it. Some pieces featuring crystals etc. can sparkle quite a lot and the diffuser can also kill this too efficiently. I'm also aware that the elbow grease I've invested in my highly polished silver work sometimes isn't obvious from photographs either.

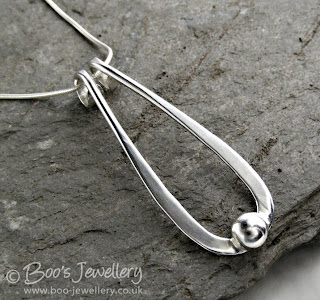
Photographing highly polished silver is a perpetual battle. You don't want the wrong reflections in the piece, but neither do you want to kill the hardp-worked shine you've given it. My habit is to give pieces my own reflections to give the impression of polish.

One of the features of my recently pimped fat ball bucket diffuser was to use the lid, lined with scrunched aluminium foil, as a further reflector. Placed over the top of the bucket, this lifts the light within the photo area by about a third of a stop and also helps diffuse the light further - it also solved the problem of items on shelves above my work area being reflected in shiny pieces through the hole in keep in the top (originally the base of the bucket) for taking overhead photographs.

The additional shine and shadow with using the diffuser and separate reflector is much better at showing dimensional detail like the soft edges (through polishing, they can be quite sharp otherwise) of this deep etching which looks rather flat when too well diffused.

So for pieces where the bucket diffuser isn't the best solution, I'd got into the habit of removing the bucket and using this lid reflector to the left of my area facing the light and placing a piece of tracing paper stuck into a frame of mounting board to the right, in front of the light - this was actually a cheap photo mount (matt) that I'd picked up from a clearance bin.

This was the first piece I tried the new diffuser with - as the etch hasn't yet been oxidised, I needed an oblique lighting angle to show the depth and detail of the etching and I also used the blank wall of light of the diffuser itself to reflect off the highly polished surface to remove all other unwanted reflections.

This set up worked quite well for larger items or where I needed more shadow, or where I wanted to hold the items for scale, hereby having much more space to get my hand in holding the item and take the photo with the other one.

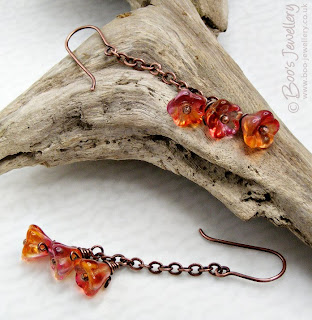
With small earrings especially, I like to photograph them being held to give a sense of scale and this isn't possible within the confines of my diffuser. This was taken using my tracing paper diffuser sheet and a scrunched foil reflector facing the light, and angled slightly downwards, to allow some of the limited light to be scattered back into the scene.

The frame itself was a little cumbersome and would occasionally fall over whilst taking photos due to the weight of the frame and its size. And the tracing paper within the frame would crinkle after extended use with being close to the warmth of the light and from being handled etc., so needed replacing periodically. My idea yesterday was to laminate a piece of tracing paper - making it lightweight and more robust for use.

So using a couple of A4 laminating pouches, I laminated a piece of good weight tracing paper that I usually use for pencil illustration work (so therefore slightly heavier than you're likely to get in a tracing pad from a stationers) and a piece of very white looking tissue paper that I'd kept aside for such a use that already looked quite translucent.

Using my laminated tracing paper diffuser I still had good even light over the piece, but a little more contrast allowed the texture and polished surface of this copper etching to be illustrated rather better.

The tracing paper laminated well and is pretty consistently toned over the sheet as it was smooth (new off the roll) to start with - and this is slightly more opaque. The tissue, which had already been creased up and smoothed out, does show a few trapped creases, but considering the quality of the original, has smoothed out incredibly well, but went noticeably more translucent as it laminated. This now gives me two versions of the diffuser depending on how much light I want to allow through.

It's worth noting here that the further your diffuser is from the light, the more diffuse the light will be. So if your diffuser is close to your light source, you'll still see some shadow detail, but as you move the diffuser further from your light and closer to your subject, the softer the shadows will become. So knowing this gives you a little more creative freedom too.

The new diffusers are lightweight and easy to prop up with a clip or two and as I always work atop my pile of A4 backing papers, the two new diffusers will just stack in the pile and be available whenever needed.

Wednesday, 15 September 2010

I'd really rather just be making pretty things

As I was uploading some newly prepared photographs to my web site earlier, I noticed that the image file list had passed 2500 files. That's just the photograph directory for my listed products for sale, which currently counts at just over 422 items.

Granted, not all of those are items actually still for sale, a significant proportion of those (probably about 30%) are now sold and remain on the site in the 'sold' category to serve as a gallery of past work and potentially items that can be re-made to order if required. But it set me to thinking about the body of work - and investment of time - this represents.

Please click on any of the photographs to see a larger view.

When I photograph an item to sell, I need 5 photographs to list on Etsy and so aim to produce more finished images than this, so that I can choose the best, in terms of image and photographic quality (sharpness, exposure, depth of field, colour etc.), angles and an all round impression of the product available. My own site will allow me to add as many photographs as I want, so I set off with the aim of taking something like 20 photographs of an item and post processing and finishing around 8 or so of them and then choosing the best of those to use.

I like to show pieces on a variety of background colours, as well as different angles. After all, buyers will potentially wear them against a varied range of skin tones and hair colouring and adjacent to an infinitely variable selection of fabrics.

It is my habit to produce at least 2 finished versions of each selected image - one each for Etsy and my own shop (required at different sizes) and usually one image per piece of jewellery that becomes a photo business card - where I like the views enough and they're the right proportions for the artwork. I sometimes produce additional variants to use elsewhere or for print publications too.

Photographs of suitable proportions, that look like they'll print nicely, are made into artwork for my photo business cards, which I print and laminate myself so that I can keep adding current designs to those in use.

I often take many 'similars' - views from the same angle, for example, but with focus placed in a different spot within the image to create different visual effects or highlight particular details of the design. I often bracket the exposure to see which looks best once on the computer - especially important with reflective silver pieces - as is a lot of trial and error in creating decent and controlled reflections.

Polished silver is especially problematic, if it reflects the light too much, it burns out to white, devoid of detail and if you get something reflected, it might not be something you'd want the world to see, so trial and error in creating appropriate reflections is sometimes the only way. Various pieces of black paper were held adjacent with this image to put detail and form into the polished surfaces.

So I tend to end up with a whole collection of images of a given piece, which I know in advance will be seriously whittled down to the quantity I hope to finally publish.

Sometimes I like to deliberately use a shallow depth of field, with a low perspective to give emphasis to a particular feature or just add drama.

So I was curious to calculate how much work this represents. If I allowed 15 minutes per finished published image as a rough guestimate, this gave rise to a total of 625 hours of work for my 2500 published images - which is nearly 16 full time 40 hour working weeks. So if I were to settle down now and start on the task, I'd maybe be finished in time to celebrate New Years Eve. This also serves to illustrate the vital need for a habitual and reliable data back up strategy - a few minutes a day could save you a whole world of hurt in the future - but it's an oversight that you only tend to make the once - often a very hard lesson learned.

Add to this the further time necessary to measure each piece and keep a record of this information and then write this into a meaningful search engine friendly description with marketing value and then the further time to actually bring it all together on a web page (and possibly several, that may require different formats), with links to associated products and ensure that is is spelled correctly and error free, you can see just how much of an investment it time it all represents.

And of course, all of this time has to be accounted for in terms of both your working weekly schedule (as does accounting, cleaning, stock control, tool maintenance, materials purchasing etc. etc.) and how you price finished pieces. It might take you an hour to make something, but if it takes another hour to photograph it, edit the images, write the description, research details on the materials used, measure it and present it on your sales venue of choice, that time also needs to be taken into consideration. If it's a design that you can repeat often and make plenty of, obviously that investment may be spread over several sales, but for one-off pieces, it can potentially be as much time as you spent on making it, so all of this needs to be considered within your pricing structure.

I've said many times that the quality of work (irrespective of the craft items themselves, this is in addition to that work) shown by artisan sellers undertaking this task is of a very high standard indeed. We each need to be accomplished photographers, copy writers, marketing and promotional gurus and also be fully informed on matters such as postal and shipping methods and often our own tax accountants too.

We also need to be accomplished at gift presentation once sold. I address environmental concerns by making most of my own packaging materials, often up-cycling materials I already have to hand. In this case, I've sewn these fabric keepsake pouches from what were quality home furnishing fabric samples from when I had a sewing shop. I make the ribbon rosebuds too - my tutorial for them is in the blog.

Many high street retailers with web sites can't even come close to the detail and quality of presentation many individual and independent artisan and craft sellers manage - often on top of full time employment- where such retailers will employ a whole army of suitably qualified and dedicated personnel to do the myriad of tasks we all need to master individually.

So kudos to the accomplished and talented members of hand made community, that could teach high profile retailers a thing or two!

Tuesday, 7 September 2010

My work this week

I'm just working on a series of photographs of a dipper we watched in a river for a while last weekend, to post, but as I seemed to spend most of yesterday working on product photographs in order to create listings, I thought I'd do a quick post on my work of the last few days, as it gives me chance to give a little more background about how a design came about or evolved from something different.

I had an enquiry to re-make a pair of earrings in my sold portfolio, but it transpired, through conversation, that the customer didn't actually have pierced ears, so I sourced some matching screw earwires to allow her to wear them straight out of the parcel, as she normally adapted them herself for wear.

The design featured some gorgeous glossy golden coloured honey opal briolettes which were heavily wrapped in fully oxidised copper, polished to the lovely burnished black of gunmetal, really setting off the colour of the opals.

Please click on any of the photographs to see a larger view.


The original earrings on round hoop earwires. I made another pair while I was working.

I'd forgotten how gorgeous the honey opal briolettes are, so whilst I had them out and had got my eye back in for the wrapping technique, I re-made some of the original design with round loop earwires and also a different style, also with darkly oxidised copper. These featured two chunky hoops of copper, wire-wrapped at the top to form a hanging loop and a more simply wrapped briolette hanging below.

I think that I might make another pair, but selectively polish back the copper on the wrapped sections and leave the plain areas dark, to give a two-tone finish, as I've already done on some designs. Alternatively, I could just use different metals for a mixed metal finish.


This necklace features large beads of stabilised chalk turquoise - a composite manufactured bead from the chalks associated with turquoise mining, but formed into a new stone when mixed with a resin and dyed - presumably the matrix is added in much the same way that I would do it making faux turquoise in polymer clay, as I have in the past.

Turquoise always lends itself to being worked with copper, the colours just always work so well together - and of course, the actual colour of turquoise originates from the copper minerals in the source materials where it forms.


The necklace started life as a bracelet - by the time I'd spiral wrapped and connected (with my own hand-sawn jump rings) enough of the chunky beads to get to a bracelet length, it became evident that it wouldn't work that well as a bracelet, the beads were just too large, making sizing it appropriately for a bracelet to be an impossibiity without compromising the design - 6 beads made it too skimpy for most people, which would then necessitate the addition of several extra rings on the clasp - but then spoling the visual balance of the design. But with 7 beads, it would be rather too generous for most people.

So I left it on my bench for a few days whilst I thought about it, thinking that maybe a different feature clasp would be the answer, but decided that the scale was perhaps more appropriate for a necklace. As soon as I started looking at a chunky chain to add to it, I knew this was a better solution, it works very much better as a necklace than it did as a bracelet. I antiqued the copper and polished the chain back to co-ordinate with the greeny brown colour of the matrix in the 'turquoise' to get the finished look.

The last piece I photographed yesterday was a pair of earrings with long feature earwires. A customer had asked me for something along these lines, so I had a tinker with some new shapes for longer earwires that in themselves would be a strong feature of the earring design. I liked this shape and just added a simple but chunky dangle to the bottom.

In this case, they're black spider web jasper beads hung on a chunkier than usual headpin, hammered into a flat paddle pin which has been shaped and polished and then double wrapped above the stone for a little extra weight and balance, then antiqued to bring out the warm tones of the copper and enhance the wrapped texture. I liked the simplicity of this arrangement, so I plan on adding more to my portfolio with different stones.

Some pieces need time to develop - and then you go back to your first idea anyway!

I finished another piece this week too - one I think I posted some time ago when I made the initial central component. This knotted piece of Sterling silver sat in my WIP box for a long while, so that I could think of how to use it/finish it off best. I was working on the principle that as a design didn't immediately come to mind, my sub-conscious would sort it out on its own in due course if left to work in peace.

I hate forcing designs, I never feel that they are fully satisfactory if you have to labour them to make them work. Most pieces come together pretty rapidly, but the occasional one just doesn't fall in place immediately and this was one such element.


In the end, turning it over in my fingers one day while I finished my breakfast coffee, I decided that I was simply trying to over-complicate it. So a simple approach might be better in this instance. So in the end, all I've done is attach it to some chain by using two sizes of graduating jump rings, to bridge the gap between the weight and width of the end of the knotted section and the finer chain, even though it's quite a chunky belcher (rollo) chain.

But that in turn left me with another dilemma - the additional weight of the chain has now made it too heavy to sell without being hallmarked.

Oh dear, it looks like I'll just have to keep it for myself then!

Saturday, 1 May 2010

This week I have mostly been photographing copper

There are always two people in every picture: the photographer and the viewer. ~ Ansel Adams

Further to my previous blog about all my recent work in copper, which included some work in progress photos, I'm going to cheat a little and just add a brief post here to update my previous comments and show some photographs of those pieces completed.

I showed this bracelet in its raw copper, post-tumbled state in the earlier blog. It has now been deeply oxidised and further tumbled to give it a lustrous glossy warm gunmetal finish, just with hints of copper showing through on proud surfaces.

I've now managed to clear some of my backlog and have got some of those finished pieces photographed and listed for sale, but I still have many to do - and all the design ideas buzzing around my head refuse to budge until they're made too. My mind works overtime with shapes and techniques desperate to take form in metal and I can't wait to get to my tools sometimes and let the ideas break free and see where it takes me.

A single piece teardrop shaped copper pendant, wire wrapped to hold a deep red dyed coral bead in position. I showed a raw copper version of another pendant of this design and they have both now been antiqued to highlight the texture of the wrapping and coiled bail.

I am aiming to treat myself to a whole day of just making things on Tuesday, as I will have a whole day to myself for the first time in a while - so I'm keeping my fingers crossed that nothing crops up over the weekend to change those plans. I will prepare my work area ready the evening before, wash the breakfast pots on Tuesday morning and then allow myself a whole day of just tinkering. I shall plug in my MP3 player, top up the coffee pot and indulge my creative desires. Bliss.

Antiqued copper and rhyolite (sometimes called Rainforest Jasper because of the earthy tones) earrings made before Easter and finally photographed.

One pair in a series of hammered oval earrings with a variety of finishes and metals. I took photographs of these whilst away over Easter, when stuck inside during a heavy downpour and found the forgotten photos with great glee this afternoon.

And sometimes, you see the item in a photograph and realise that it just doesn't work as well as you hoped. I was really happy with this swirled copper ring wrapped with silver - it actually looks really nice in person, but in the photographs, the antiquing looks scruffy and rough and the wrapping looks loose and undisciplined. So I shall have to give it some more attention if it's to look decent in the 'larger-than-life' photographs. It's one of the inherent perils of showing small items of jewellery like this, they end up being shown somewhat larger than they are in reality and it really highlights any shortcomings in your workmanship.

Friday, 23 April 2010

This week I have mostly been working in copper

“The world is an old woman, and mistakes any gilt farthing for a gold coin; whereby being often cheated, she will thenceforth trust nothing but the common copper” Thomas Carlyle, Victorian essayist.

Hammered copper, heavily antiqued, spiral link bracelet.
Please click on any of the photographs for a larger view.

The last couple of weeks have been hectic - an assortment of commissions to complete, work commitments, domestic dramas, our visiting son (I'd like to think he comes home from university to catch up with his Mum, but in reality he was only availing himself of my fast broadband connection, as the dent in my bandwidth allowance will testify) and even some time away over Easter.

So if anyone happened to be so devoid of entertainment they were monitoring my publicly visible work rate, they'd perhaps consider me tardy of late - I haven't seemingly had much to show for the long hours and exhaustion levels.

I spent a lot of time before we went away for Easter in preparing things to take with me to work on; part-made components to finish, components that I could make into ideas I had etc. - all in case of bad weather and the need to find things to do. I had enough materials with me to make a hundred pieces of jewellery. All I eventually managed was this necklace (with matching earrings) and another pair of earrings. Antiqued copper and green glass.

I quite liked the smooth look of the back of the antiqued bracelet above, where polishing off the oxidisation, left a pattern of colours on the smooth copper, from bright peach to a deep gunmetal type blue/grey. So I made another version without the hammered texture and will give this the same colour finish. I sometimes just like to enjoy them in their raw state before I give them their final colour.

A spiral wrapped Botswana agate bracelet in it's raw copper just-tumbled state, which has since been deeply oxidised and extensively tumbled to a deep gunmetal warm grey.

But behind the scenes, like a little hammer-wielding gnome, I have been quietly (not that my hammering can ever be claimed to be quiet) producing several new pieces. But the making of the jewellery is the fun bit - that's where I find my joy, peace from the world and my personal satisfaction - I get so embroiled with the details of shapes and the engineering of making things work properly that the world just passes me by and I often only come to my senses when the growling in my belly reminds me that I really should have had lunch several hours ago.

Hammered and elongated soldered chain link earrings, with rosy copper molten buds.

But once complete, after enjoying it for a short while on my own, I must present the result of my efforts to the world. I really can't expect pieces to sell if they're still sitting on my work bench unseen. And this is the part, like most artisan sellers and self-representing artists, that I find most tedious, time-consuming and plain disagreeable.

A pendant in progress, which has since been antiqued. I love to see raw shiny just-tumbled copper, so often take WIP photos at this stage. Just because the colour is so pretty.

As someone who has listed photography as a passion for an alarmingly large number of years, I do not find photographing my work to be in the least bit enjoyable. And despite having now done quite a lot of it and to have gradually honed my workflow to be about as efficient as I think I can get, it still seemingly takes an inordinate amount of time - far longer than it feels like it should or I'm happy to give it. And don't even get me started on the process of measuring everything, working out a price and writing appropriate descriptions. I get through it by issuing myself with incentives - if I finish listing two items, I can work on the bracelet I'd started etc.

Large Serpentine beads spiral wrapped with copper into this bracelet with hand crafted hook and an adjustable chain closure and Aventurine dangle. The copper has been antiqued.

So, in the purely selfish interest of trying to make it look like I have actually done something of late, I present some of my latest pieces and the first photographs I've taken of them. I've also included some work in progress photos (WIP) as I often take photographs for my own reference and they don't otherwise ever see the light of day.

Only another 25 pieces and several hours wrangling photo props and cameras and then manipulating images left to go!

Monday, 18 January 2010

I've pimped my lighting diffuser

Further to my tutorial article on my own hand made - for free - lighting diffuser for product photography, I have added some features which I'd had in mind for a while and thought I'd pass the ideas on.

If you want more information on photographing small objects in this manner, I also have a more general tutorial on the photography process itself, in respect of small items.

I had reason in December, when taking some product shots for a client that were a little large for my usual diffuser, to utilise a larger bucket I'd saved for such purpose, to make another larger one. I incorporated the new feature ideas I had in mind and liked them so much, I added them to my regular small diffuser too. I now alternate between them, depending on the size of the piece I need to photograph, or the set props I want to squeeze in. The new features have been really indispensable, so I wanted to outline them for those that found my original tutorial useful.

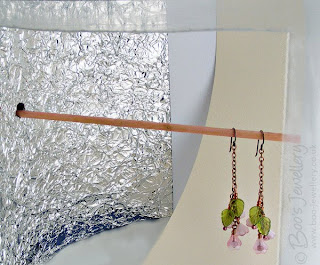
By drilling a hole in the side, I can poke twigs, dowels etc.
through to hang earrings. See below.


The basic premise - and I do recommend reading the article linked to above first - is to use an upturned translucent bucket (mine contained fat balls for wild birds) as both a lighting diffuser and reflector, for small item photography. By lining the side opposite the light source with scrunched aluminium foil which reflects a great deal of additional light back onto the subject, I can get away with using a single light source - although granted mine is a daylight fluorescent ring, so the light is quite spread already and a good colour.

I use my upturned fat ball bucket diffuser for all my jewellery photographs.

I already have a magnifier light clamped to my work bench to use when working on small and fiddly things, so I developed the original diffuser to make use of this and minimise the set up time when I need to take photos - for many years I'd been over-complicating things using multiple lights and my DSLR and it was just no fun taking photos at all - once I cut out most of my gear and started using a compact camera, it became much more workable.

Sometimes it's easier to get an overall flat view by lying the subject flat
and shooting it from overhead, using the hole I cut in the top for this purpose.


My diffuser lives pretty much permanently on the end of my bench on top of a pile of background papers and I just pull to the top of the pile the one I want to work with. Consequently, I don't have much space to work in and so must do so efficiently.

I made a very rough diagram to show the various features.
Please click to see a larger view, it's easier to read the annotations.

Further to the original tutorial, I have added 4 features to my bucket diffuser:
  1. Some background paper inside the bucket to give me a safe shooting zone for lower angles;
  2. A small slot cut in the top/bottom to take a clip to hold additional background papers;
  3. A hole drilled in the side to allow a dowel, twig, rod or wire to be passed through to hang earrings off;
  4. I've lined the lid with scrunched kitchen foil to use as an additional diffuser and protect from reflections.
1. The original bucket was lined on the light side with tracing paper to diffuse the light and the opposite side with scrunched aluminium foil to scatter and reflect the light back from my single light source. The lighting just needs to be diffuse enough to soften any harsh shadows from your light and prevent any unwanted reflections from items outside the bucket. I still like to retain some soft shadow to give the subjects form. If the light is too diffuse and too flat, items can start to look a little unrealistic and lacking in shape.

My original bucket worked pretty well, but I had to be mindful of my angles taking the photos and keep above the subject, so that I didn't catch any of the inside of the bucket in the background. But occasionally, you want to shoot something as though it were at eye level and this perspective requires a suitable background behind. So I tacked a fairly narrow piece of vellum textured white card opposite the opening I take photos through to give me a small region of safe background to align myself with when needed. As most of my subjects are small, it doesn't need to be very wide. Using white as a starting point didn't impact on the light levels.

Sometimes I like to shoot from below the subject, or at eye level and this requires a safe area behind the subject.

Using tracing paper on the light side of the 'bucket' diffuses the light source nicely and softens the shadows from the uni-directional light, but I still like to see some shadow to give the subject form and depth, so I don't diffuse it too heavily.

2. To supplement this, I also cut a slot in the top (what was the bottom) of the bucket to allow me to use a small stationery clip to hold additional backgrounds in this area. I made this slot by drilling a row of holes parallel to the edge and then cutting the spare plastic out from between them and sanding off the rough swarf.

I tend to use long thin background papers with this clip, to allow me an infinity sweep type background behind long earrings etc. If I attach it at the top and let it naturally curve behind the subject and onto the base, I have no 'joins' and this increases my space visually.

Using a long narrow piece of background paper, clipped only at the top, I get a natural curve behind my subjects.

3. As you can see in the photograph above, the earrings are hanging on a piece of dowel. My third new adaptation, was to drill a hole in the side of the bucket so that I can poke a rod, dowel, wire or twig through the hole - clamped securely outside of the bucket - and hang earrings and other pieces from it. Previously I had a stand I used within the bucket, but this is much simpler and works much better for me - I found the earlier incarnation to be clumsy in use.

I used a 'helping hands' style clamp outside the bucket to hold my dowel in place. I've since made a purpose built clip on a weighted base that takes up less space and frees up my clamp for other tasks.

4. After trying to trace a bright yellow reflection in some polished silver one day, I realised that the open top of the diffuser bucket is quite a vulnerable spot when taking photos of flat reflective surfaces. The hole in it (cut to allow overhead photographs to be taken) offers no protection from reflections - my yellow spots were from something small on a shelf above me - so I lined the lid from the original bucket with the same scrunched aluminium foil and just sit this over the top of the bucket to kill any overhead reflections and to further reflect a little light back in - I found that I have gained a third of a stop exposure just from using it and it makes the overall light that bit more diffuse too. So I just leave it in place unless I need to access the top.

In this case, I used a dark blue clip to hold my background paper, so that you could see it in the photos, I usually use a white one. You can see the foil reflector above, stuck to the inside of the spare lid.
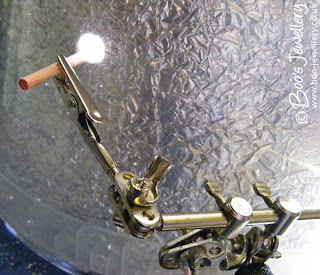
I can easily lift it off when I need to use the hole or clip papers in place, or just use the overhead hole for wrangling my subjects. I actually lined the outside of the lid as it had a lip which stood proud and this allows it to sit in place over the smaller base.
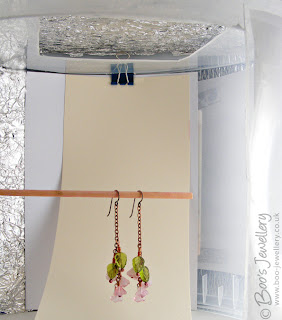
The hole to take a twig and the slot to clip background papers allows me to hang long earrings naturally with minimal working space.

Thursday, 24 September 2009

Set dressing your product photographs

The photography of small hand crafted items to make them available for sale is a perpetual source of frustration and anguish and often detracts from time available to spend on actually making things - the fun part!

One of my favourite backgrounds, a piece of green slate bought from the Honister slate mine in the English Lake District. I de-saturated the colour of it a little in this image as I just liked the texture against the smooth polished silver. I bought several pieces for my garden as it's a gorgeous jade colour when wet - I must remember to wet it one day when I use it.

There are many issues of concern associated with product photography - from the decision on what camera to buy to technical photography issues, lighting issues, finding the best place to work etc. etc. One subject that often comes up is that of backgrounds and 'set dressing' - how many additional props are distracting and do things look better on plain white or black backgrounds, letting the item speak for itself?

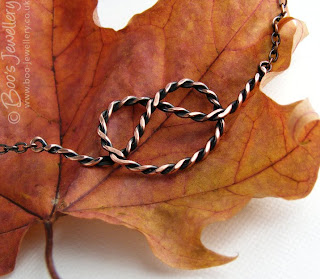
As we approach autumn and as I just love the colours, textures and shapes of fallen leaves, I wanted to use these as props in my photographs and this maple just screamed out to be teamed with some copper.

Some people recommend that all of your photographs should use the same style, setting and colour way to give a cohesive feel to your shop and establish a style that will be associated with your work, but I feel that even if my customers liked the results, I'd personally get pretty bored working on similar looking photographs week in, week out. In order to retain my own interest in the project, I enjoy thinking of ways to show a piece off, to find papers and textures to use as backgrounds and small found objects to use as props.

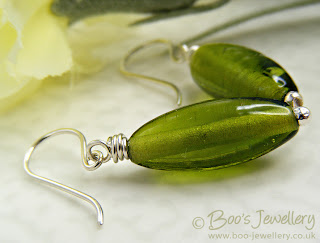
I thought these hand made glass earrings looked like spring leaves, so a light parchment base and a hint of spring blooms with a silk flower in the background enhanced that bright feeling.

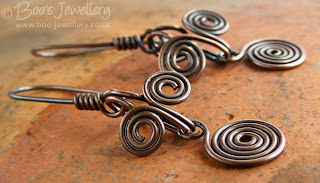
Another well used favourite - this is the bottom of a handmade earthenware pot I rescued from my grandmother's pantry - it is a lovely rich colour that can lift the pieces and has just enough texture and detail to make it interesting.

I'm personally of the opinion that a little window dressing adds to the overall attractiveness of the final photograph. You want to make an attractive image where the props and backgrounds compliment your work, hopefully without overpowering it or detracting from it. Some of my favourite objects are simply household items, often looked at from a different perspective - as above, the bottom of this pot is rather more interesting than the view you're supposed to appreciate.

This little piece of driftwood is becoming quite the star of my photos. It's just the right size, a nice gentle colour and has lots of ridges and notches to prop work against. I found this on a lake shore after a storm - it has been smoothed by being thrown about in the water for some time. It's simply a lovely piece of natural sculpture.

I especially like textures for backgrounds - nice hand made papers, natural surfaces and colours that enhance the piece. I have amassed quite a collection of items to use. Very few of which I have paid money for. If I see a nice paper lining a box of chocolates, or wrapped around cut flowers I'll retrieve it. I have an A3 size zipped portfolio that I store all my papers in and I periodically rifle through them to use pieces I've not done so for a while, it's easy to keep working with the same backgrounds and I have to remember to refresh the look once in a while.

This background paper is the lining parchment from a box of very expensive chocolate truffles.

Is your background too dominant - then tone it down:

The initial tip I started this blog to pass on was a way of making your backgrounds go further - several looks from a few papers - and can also make the results more subtle where your favourite paper is a little too bold. Some time ago I bought a pack of 5 sheets of parchment paper - A4 sheets of translucent paper each with a slightly different watermark within the paper. One is marbled, another striped, my favourite has random splodges. If you place a piece of this parchment - tracing paper would work too, but would be plain - over your background paper, it immediately tones it down significantly - reducing the contrast of a pattern that might overpower your piece.

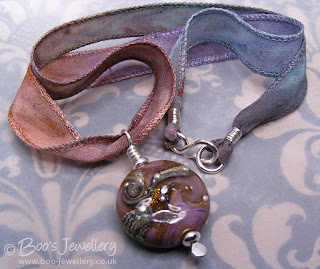
The kraft paper I used here came wrapped around some supermarket cut flowers. It is black and tan coloured and far too contrasty on its own for a background, but under some parchment, it was toned down and took on the right colours to blend with the lampwork bead and silk ribbon.

Of the 5 original sheets, I regularly use 3 of the patterns and they're always out in my photography area, slipping one over your background paper, immediately give you a whole new look. You can retain the pattern and colour cast of the paper you liked in the first instance, but it is now much more subtle in appearance.

This background is a sheet of gold printed tissue paper, where the print is rather too clear for a background, but I like the colour and design of it. Placing it under some parchment toned the print down yet left me with the print I like.

LinkWithin

Related Posts with Thumbnails