Showing posts with label product photographs. Show all posts

Friday, 28 October 2011

Can you take decent product shots with a low end camera?

There was a thread started in the Etsy forums recently in respect of the limitations of low end point and shoot cameras and their suitability, or lack of it, for taking product shots for selling. A lengthy discussion ensued and as is usually the case, every possible interpretation and perspective on this issue was aired.

From the opening post by WillowontheWater:
"Sure, you CAN get some great shots off of a low end camera, but how long does it take? Not only to get the shot, but then to edit it? I have said it before and I'll say it again... the proper tool makes all the difference."
I added my own thoughts to the subject too. Whilst the opening post had some indisputable truths, I felt that it was in no way the whole story. Getting decent product photographs is a combination of equipment - both camera, lighting and staging - but perhaps the most significant factor is technique. Understanding your camera, some of the basic principles of photography and how to get the best from what you have, would actually solve the vast majority of photography problems posted about in the forums.

Please click on any of the photographs for a larger view, they look rather dark here on the page.
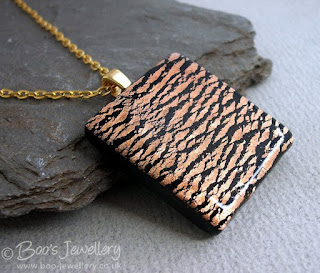
A polymer clay faux dichroic glass pendant taken with a very basic point and shoot camera with minimal setting options.
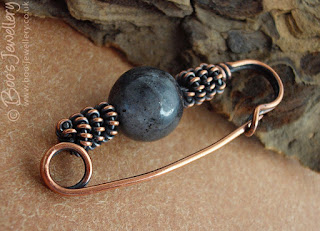
I don't think that I've personally seen a thread where the photography problem could only be overcome by buying a new camera - that the camera was the only factor letting the user down. In almost every case, the problems can be overcome - or at the very least, improved upon - with an adjustment in camera setting or a modification of technique - such as focusing in the right place or using a support for the camera to remove camera shake. Most users experiencing difficulty would probably be better served spending money on additional lighting, daylight bulbs or a small tripod - and not necessarily on camera equipment.

Most of the problems posted are about 4 main issues; blurred images (due to either camera shake or inappropriate focus), the wrong part of the subject being in focus (usually due to using the camera closer to the subject than it can focus), incorrect white balance (whites looking blue or orange etc.) or exposure problems - and those are almost always about items on white backgrounds looking too dark and coming out with grubby backgrounds. It doesnt matter how much light you throw on your subject, if you underexpose for the scene, the images will always look too dark.

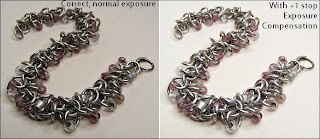
The advice posted is often to shift the levels in photo editing software retrospectively, when in reality, all the crafter needs is to do is to add some positive exposure compensation to ensure that the white background looks white in the resulting images.
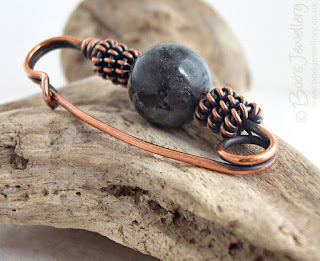
Using a little positive exposure compensation in shots that are predominantly light can ensure that your white backgrounds stay that way - in this case I used two thirds of a stop of positive exposure compensation (+0.67 EC).

Much more detail on overcoming this sort of photography problem is covered in my small item photography tutorial and doesn't need to be repeated in detail here at this time - and I have a list of all my photography articles and blogs on this page here on the blog.
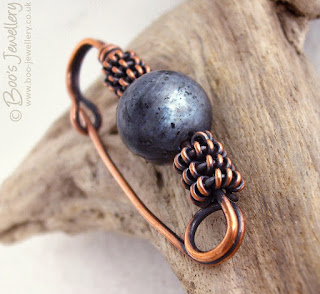
It's an oft-posted mantra that the crafters don't have 'enough' light to get bright photographs - in reality, it's possible to take perfectly good photographs in very little light indeed - what does matter, is how you expose for the light that you do have and how you manage your technique when the light levels fall.

If your lighting level is low, you may encounter problems associated with slow shutter speeds for example, resulting in camera shake from your hands moving whilst the shutter is open to take the shot - that can be overcome by either changing camera exposure settings to ensure a faster shutter speed, where that's practical and possible to do so (it wasn't in my little experiment shots here due to camera limitations), or by using a support for the camera, like a tripod or bean bag.
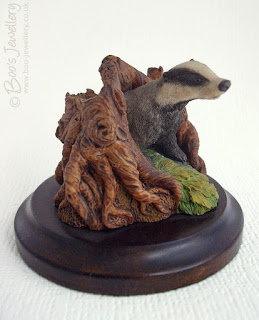
The opening post in the forum thread in question linked to a blog with some example photographs taken with a basic model second hand Canon point and shoot camera - which actually had a higher spec than the examples I've posted here. Considering that the poster is an experienced and very capable professional photographer, I think the photographs were taken by just pointing and shooting and very little regard for correct technique for the subject in hand, perhaps just to make the point that you can't just 'point and shoot' them. The photographs were pretty appalling (the point the poster was making) - but I didn't think they needed to be.
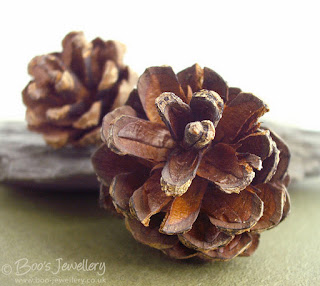

It was my contention, as already stated, that technique is by far the most powerful tool in your arsenal - I've often said that a little know-how and understanding can make a massive difference. All of the photographs posted here were taken with a Fujifilm A850 camera that my husband uses as his own walkaround camera. He has no interest in fiddling with settings, so I've pre-set this model with some settings to suit his personal uses for the camera and he just switches it on and squirts away at the scenery and gets some annoyingly good results too.

The camera is very basic - it cost us under £60 GBP 4+ years ago. It has 3 modes, one for photographing babies that doesn't use flash and offers soft skin tones (I'd like to try that for this task, it might actually work quite well), fully Automatic and what they call a 'Manual' mode - which in reality is the same as auto, but the camera relinquishes decisions about some settings to the user. I chose the latter and put some objects in my usual lighting setting - a daylight fluorescent ring light with a diffuser over my subject - I couldn't adjust exposure other than by using exposure compensation and I couldn't even turn off the flash, which seemingly came on when the shutter speed went too low - so I found I could prevent this from happening by being careful with the exposures I secured.
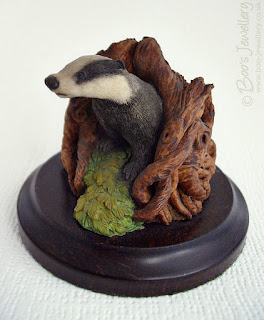
I used macro mode, which allows the camera to focus closer to the subject than for general photography and I used Auto white balance for most of the frames, as I was using a daylight tube and it seemed to work reasonably well - some looked a little cold, so I swapped to the fine/cloudy pre-set, but once on the computer, these actually weren't as realistic for colour, so I adjusted them to match the earlier AWB shots.

I found focusing more tricky than with my usual, slightly more featured product photography camera and I can see now that some aren't optimally focused, so some more time with the camera would learn the quirks of its focusing - as it tended to shoot with a wide open aperture and this led to a shallower depth of field than I usually try to achieve, which in turn gives a greater margin of error for sharpness - so as I can't control aperture, I'd need to be more mindful of that in future and focus more carefully.
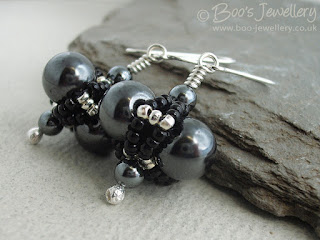

Far from spending a lot of time on these, they had exactly the same workflow as I usually perform on my product shots - in fact somewhat less, as these are sharpened in the camera and have higher contrast than I normally use, so I reduced/omitted these stages in my post processing. I started typing my post here less than 30 minutes after picking up the camera, so that was the time I spent taking the shots, dusting some of my props, booting the computer I download images onto, transferring them over the network to my working computer (which acts as my back up method too), choosing frames, post processing and saving the finished images.

The exposures/tonality are largely as they came out of the camera, I cropped for framing, tweaked white balance a little as the auto WB did fluctuate a bit between frames (I wouldn't normally choose it for that very reason), did very modest levels adjustment - as I would with any shots - cloned out any fluff or dust and reduced in size and locally sharpened. If you want to see the exposure information, the EXIF data should be intact in the images, but you'll probably have to click through the image to the gallery overlay, then select the link for 'Show original' in the bottom left hand corner.

I was curious to try and see just how workable a very basic 'low-end' camera could be in practice and whilst I can see there are clearly some shortfalls in these photographs and they certainly don't look that pretty at full resolution, the results are actually better than I was expecting and having checked them on the computer, if I were to repeat the exercise now with what I've already learned, I would expect the next series would be somewhat better with appropriate tweaks in my own technique appropriate to this camera.

Wednesday, 15 September 2010

I'd really rather just be making pretty things

As I was uploading some newly prepared photographs to my web site earlier, I noticed that the image file list had passed 2500 files. That's just the photograph directory for my listed products for sale, which currently counts at just over 422 items.

Granted, not all of those are items actually still for sale, a significant proportion of those (probably about 30%) are now sold and remain on the site in the 'sold' category to serve as a gallery of past work and potentially items that can be re-made to order if required. But it set me to thinking about the body of work - and investment of time - this represents.

Please click on any of the photographs to see a larger view.

When I photograph an item to sell, I need 5 photographs to list on Etsy and so aim to produce more finished images than this, so that I can choose the best, in terms of image and photographic quality (sharpness, exposure, depth of field, colour etc.), angles and an all round impression of the product available. My own site will allow me to add as many photographs as I want, so I set off with the aim of taking something like 20 photographs of an item and post processing and finishing around 8 or so of them and then choosing the best of those to use.

I like to show pieces on a variety of background colours, as well as different angles. After all, buyers will potentially wear them against a varied range of skin tones and hair colouring and adjacent to an infinitely variable selection of fabrics.

It is my habit to produce at least 2 finished versions of each selected image - one each for Etsy and my own shop (required at different sizes) and usually one image per piece of jewellery that becomes a photo business card - where I like the views enough and they're the right proportions for the artwork. I sometimes produce additional variants to use elsewhere or for print publications too.

Photographs of suitable proportions, that look like they'll print nicely, are made into artwork for my photo business cards, which I print and laminate myself so that I can keep adding current designs to those in use.

I often take many 'similars' - views from the same angle, for example, but with focus placed in a different spot within the image to create different visual effects or highlight particular details of the design. I often bracket the exposure to see which looks best once on the computer - especially important with reflective silver pieces - as is a lot of trial and error in creating decent and controlled reflections.

Polished silver is especially problematic, if it reflects the light too much, it burns out to white, devoid of detail and if you get something reflected, it might not be something you'd want the world to see, so trial and error in creating appropriate reflections is sometimes the only way. Various pieces of black paper were held adjacent with this image to put detail and form into the polished surfaces.

So I tend to end up with a whole collection of images of a given piece, which I know in advance will be seriously whittled down to the quantity I hope to finally publish.

Sometimes I like to deliberately use a shallow depth of field, with a low perspective to give emphasis to a particular feature or just add drama.

So I was curious to calculate how much work this represents. If I allowed 15 minutes per finished published image as a rough guestimate, this gave rise to a total of 625 hours of work for my 2500 published images - which is nearly 16 full time 40 hour working weeks. So if I were to settle down now and start on the task, I'd maybe be finished in time to celebrate New Years Eve. This also serves to illustrate the vital need for a habitual and reliable data back up strategy - a few minutes a day could save you a whole world of hurt in the future - but it's an oversight that you only tend to make the once - often a very hard lesson learned.

Add to this the further time necessary to measure each piece and keep a record of this information and then write this into a meaningful search engine friendly description with marketing value and then the further time to actually bring it all together on a web page (and possibly several, that may require different formats), with links to associated products and ensure that is is spelled correctly and error free, you can see just how much of an investment it time it all represents.

And of course, all of this time has to be accounted for in terms of both your working weekly schedule (as does accounting, cleaning, stock control, tool maintenance, materials purchasing etc. etc.) and how you price finished pieces. It might take you an hour to make something, but if it takes another hour to photograph it, edit the images, write the description, research details on the materials used, measure it and present it on your sales venue of choice, that time also needs to be taken into consideration. If it's a design that you can repeat often and make plenty of, obviously that investment may be spread over several sales, but for one-off pieces, it can potentially be as much time as you spent on making it, so all of this needs to be considered within your pricing structure.

I've said many times that the quality of work (irrespective of the craft items themselves, this is in addition to that work) shown by artisan sellers undertaking this task is of a very high standard indeed. We each need to be accomplished photographers, copy writers, marketing and promotional gurus and also be fully informed on matters such as postal and shipping methods and often our own tax accountants too.

We also need to be accomplished at gift presentation once sold. I address environmental concerns by making most of my own packaging materials, often up-cycling materials I already have to hand. In this case, I've sewn these fabric keepsake pouches from what were quality home furnishing fabric samples from when I had a sewing shop. I make the ribbon rosebuds too - my tutorial for them is in the blog.

Many high street retailers with web sites can't even come close to the detail and quality of presentation many individual and independent artisan and craft sellers manage - often on top of full time employment- where such retailers will employ a whole army of suitably qualified and dedicated personnel to do the myriad of tasks we all need to master individually.

So kudos to the accomplished and talented members of hand made community, that could teach high profile retailers a thing or two!

Sunday, 6 June 2010

My garden is now ready to face summer

Alternative title: another gratuitous opportunity to post some photos I took over the weekend. Please click on any of the photographs to see a larger view.

I have a small garden. A very small garden. Not the kind of small garden they talk about in the commentary to the Chelsea Flower Show TV coverage - mine is merely postage stamp sized - far too small for a garden designer to trouble themselves over. A friend came to visit me one gorgeous day a few years ago and I suggested we take lunch into the garden to which he commented "I knew you had a small garden, but I didn't think it was this small!"

As we like to eat out as often as weather permits and I like to take my work outside too, I concentrated on flowers with fragrance this time and got two of these candy striped phlox plants which are a dome of those pretty little flowers.

I've blogged in earlier summers about my garden - it's basically the enclosed back yard of a Lancashire cottage, intended to house the outside facilities and for storage of logs and coal and for drying washing, the house being built pre-indoor plumbing, central heating and tumble driers.

I keep several dichondra each summer, each in a separate pot on their own adjacent to seating, purely for stroking purposes you understand. They're deliciously velvety and soft to run your hands over, just like stroking a weimaraner puppy.

My house is a long thin tall stone cottage of about 140 years old, so my yard is too. The house sits in what is basically a square plot, divided into three long strips. The house sits in the middle third, with a long thin garden on either side.

I've only just finished the summer planting, which will need to fill out - and hopefully flower - a considerable amount yet - so it looks a tad scrawny still, but another month will see a huge difference.

The garden in question is enclosed within 6 foot high stone walls and the base is entirely concreted. The concrete is of very poor quality and badly uneven, so we covered it with small sized gravel when we first made it into a garden some years ago. When we first decided to make it into a garden, largely as an area for sitting out to eat in summer, it was pretty bare, unnaturally new-looking and has taken a number of years to fill out and develop a personality. It's finally reached the stage where it looks like a proper, established garden. I suspect these things can only be hurried along if you have deep pockets.

Height is achieved in this area as the display is based on lots of cut logs from a dead tree my father felled in his garden - logs of different heights simply stand on end and form stepped risers for smaller pots. In fact, some of the plants have simply seeded themselves into crevices in the timbers.

Everything grows in pots, so we do periodically lose things that just run out of steam when confined to a pot, so every year it is slightly different and I supplement the perennial, largely green, planting with summer bedding to add colour. That has been my priority for the last couple of weekends and I finally put my trowel down last night as darkness drew in and declared it finished. As far as a garden ever can be finished. But I've planted all the new things I'm going to this summer.

I think the deep frost and extensive periods of cold this winter seemed to benefit this pyracantha - which doesn't like to flower that often, but is going to put on a good show this time. The flowers at the top, that get more sun, have already opened. It has wicked, long sharp thorns though (hence one of its names of Firethorn), so I tend to leave it to its own devices.
I went out to admire my handiwork in the light this morning, just as it started to rain. But it was nice, gentle downward falling summer rain, without wind and the air was just nicely shirt-sleeve warm. The beauty of that sort of still gentle rain is that it lands and remains largely undisturbed, forming jewel like droplets on leaves and flowers. A perfectly beautiful phenomena in its own right.

So I grabbed a camera and just spent a pleasant Sunday summer morning under my umbrella in the company of my camera.

Shame that I can't include the fragrance with this Pink, it's fabulous within the enclosed walls of the garden.

The waxy leaves of roses are ideal for the raindrops to form droplets.


This Japanese maple was the first big feature plant I bought and is just turning green from its spring red, returning to this flame like appearance in autumn.


'Peaches and cream' Verbenas - just look at the perfect spherical beads of rain in the centre, what could be prettier?

Sunday, 3 May 2009

It's amazing what there is to see when you look closely

You can click any of the photos to see a larger version.

My very modest postage stamp of a garden has been a great joy to me since we developed it from scratch. It has filled out and developed over the years into a haven of peace - the place I reward myself with time when I reach some deadline or the end of an especially tricky piece of work. I potter and tinker as I eat my lunch and work outside on every day the weather makes it possible.

I laughingly call it my 'courtyard garden'. In reality, it started life as a typical yard to a Lancashire cottage - a walled patch of concrete, originally to house the outside facilities - and in more recent times, the bins.

There is a tale attached to the layout of our house and outside areas, which are pretty much back to front. It would be normal practice for houses to face the street and have their back yards on the side of the house furthest from the street, but our house is one of a collection of cottages, all slightly different, that housed the workers of the adjacent mill. Mine, the largest and end of a short row, is reputed to be the mill manager's cottage. My yard and back door are on the street side and my 'front' door on what is the gable end.

When they were built, the owner of 'our' mill was in some sort of feud with the owner of an adjacent mill, who owned a very large domestic property of some status (in recent times it has been a nursing home) along from the row of mill workers' cottages. In order to cause him maximum offence, our mill owner built the properties back to front, to ensure that the outside facilities and less attractive aspect of the houses faced the road, so that as his rival drove past to his large luxurious home in his carriage, he had to pass the back of the workers' homes, offending his sensibilities.

Our cottage is a long thin stone built property of about 140 years old now. So the yard is long and thin too. We have our proper garden on the other side of the house, but the layout doesn't make it as suitable to occupy, so I leave that as my bird garden - one to be viewed from inside and enjoyed through windows and my courtyard garden is the one we spend time in. Being fully walled it gives us more privacy and is a sheltered sun trap that has allowed it to thrive.

Due to unfortunate domestic circumstances, I'm not going to be able to spend any money on summer planting this year, or at least only the barest minimum. So I decided today to make the best of what we already have.

I've always kept a lot of evergreen plants and perennial greenery to supplement annual flowers, which ensures that it looks good and has interest all year. Which will come into its own this season when I can't do so much summer planting. So we moved things around to fill gaps and re-potted things and gave it a good tidy and I was pretty happy with the results.

It's at that exciting time when everything is waking up after winter and even supposedly 'green' shrubs develop little flowers and new growth races away. I took some photos - most of these below are of very small areas of growth, tiny little flowers at the end of shoots - some only a few millimeters in diameter. This is why I love taking photos of little things - you get to see detail that you just don't see with the naked eye.

I was astonished to see that this little flower at the end of a growing shoot actually has striped petals on the back - why does nature bother to give it this detail?

Saturday, 30 August 2008

Common product photography problems:

Perhaps the most common product photography problems I see posted about in forums like those on Etsy, is how to combat either dark photos with grey backgrounds which are supposed to be white, or backgrounds with a colour cast that are also supposed to be white.

Underexposure & incorrect white balance:

Both are very easily fixed, it's how you're exposing the shots that causes the greyness and incorrect white balance that causes colour casts.

A little exposure compensation on your camera will fix underexposure and grey backgrounds a treat - I've written a tutorial which covers both issues and several others. Choosing the correct white balance, or setting up a custom one for combined lighting sources can fix weird colour casts. Very often, both are an issue and fixing them in the camera will save a lot of post-processing work later.


See this page - underexposure of this nature is explained and illustrated about two thirds down the page: http://www.boo.myzen.co.uk/artisan.html

One simple adjustment on your camera will sort it out - if you can't find the controls for it, come out of auto mode and try something like P (programmed auto) or A (aperture priority) instead - that often relinquishes a lot of controls the camera takes over in full auto mode.

LinkWithin

Related Posts with Thumbnails